Gallery

Tuesday, June 20, 2017

On Feet Commissions

Here are some of the customs I have completed on the feet of those who commissioned them.  It was an absolute pleasure to work on each and every one of these custom sneaker projects.  I will continue to update this post as more pictures come in.  Stay tuned for more.  Thanks, everyone!

Pink Sakura - Okinawa, Japan
RVHS Camouflage - California, USA
Samurai Custom - Manila, Philippines
Spurs Custom - Manila, Philippines
Lakers Poor Man's Weapon - Manila, Philippines
Harry Potter (Gryffindor / Ravenclaw) - California, USA

Saturday, May 27, 2017

How to Customize Sneakers / Shoes: Pink Sakura Camouflage

There are a ton of people out there who customize shoes.  Some do it for fun, some have figured out how to make a living out of it.  I'm somewhat in the middle as I have a deep passion for drawing, an obsession with sneakers and a hope (a dream) to one day have a career in art.  It doesn't necessarily have to be in shoe customizing but something that will let me use my artistic abilities.


In this post, I'll be sharing some tips on how I customize shoes.  This is nothing new or ground breaking as there are YouTube videos out there from more experienced artists providing their own tips and techniques.  Nonetheless, I still think it's important that I do my part and share what I know in case some of you may want to give shoe customizing a try one day.

Before I get into the tutorial, here's a little disclaimer.  Anyone with a little artistic ability beyond stick figure drawings can customize shoes.  But...to be good (even great) at this, you need a ton of PATIENCE.  With that said, let's get into the tutorial.

STEP 1: Clean the shoes


I use a standard bathroom / kitchen brush which can be purchased at any local hardware store.  For the cleaning solution, I mix (1) part water, (1) part glass cleaner with ammonia and a tablespoon of dishwashing liquid and is dispensed using a spray bottle.

Unlace the shoes, spray the solution on the shoe and scrub away.  Use a rag to wipe away the solution after brushing. Do not rinse off the shoe with water as we want to avoid as much moisture on the shoe.

(If the shoes are new, you may skip this step and proceed to Step 2)

STEP 2: Prep the leather for painting


For this step you need Acetone (nail polish remover), cotton pads and latex gloves (optional).  I would highly recommend higher end cotton pads and not cotton balls to prevent unnecessary cotton fibers getting stuck on the surface of the shoe.

Soak (careful not to oversaturate) the cotton pad with acetone and lightly scrub the surface of the leather to remove the factory clear finish.  You don't need to scrub hard but make sure to thoroughly wipe all areas of the shoe you plan to paint.  

STEP 3: Select your paint


I use (along with the rest of the shoe customizing world) Angelus Brand leather paints.  It is proven and I haven't seen any other product come close to being as effective.  If you don't have access to Angelus paints locally, they deliver worldwide.  Click on this link to access their website: ANGELUS DIRECT

These paints can be used straight out of the bottle after a good shake to ensure it is mixed thoroughly.  They can be applied with a good set of brushes or sprayed on using an airbrush.  For airbrushing, you will need to dilute the paints with another Angelus product called "2 - Thin".  As for ratio, Angelus recommends a 4:1 ratio of paint to "2 - Thin".


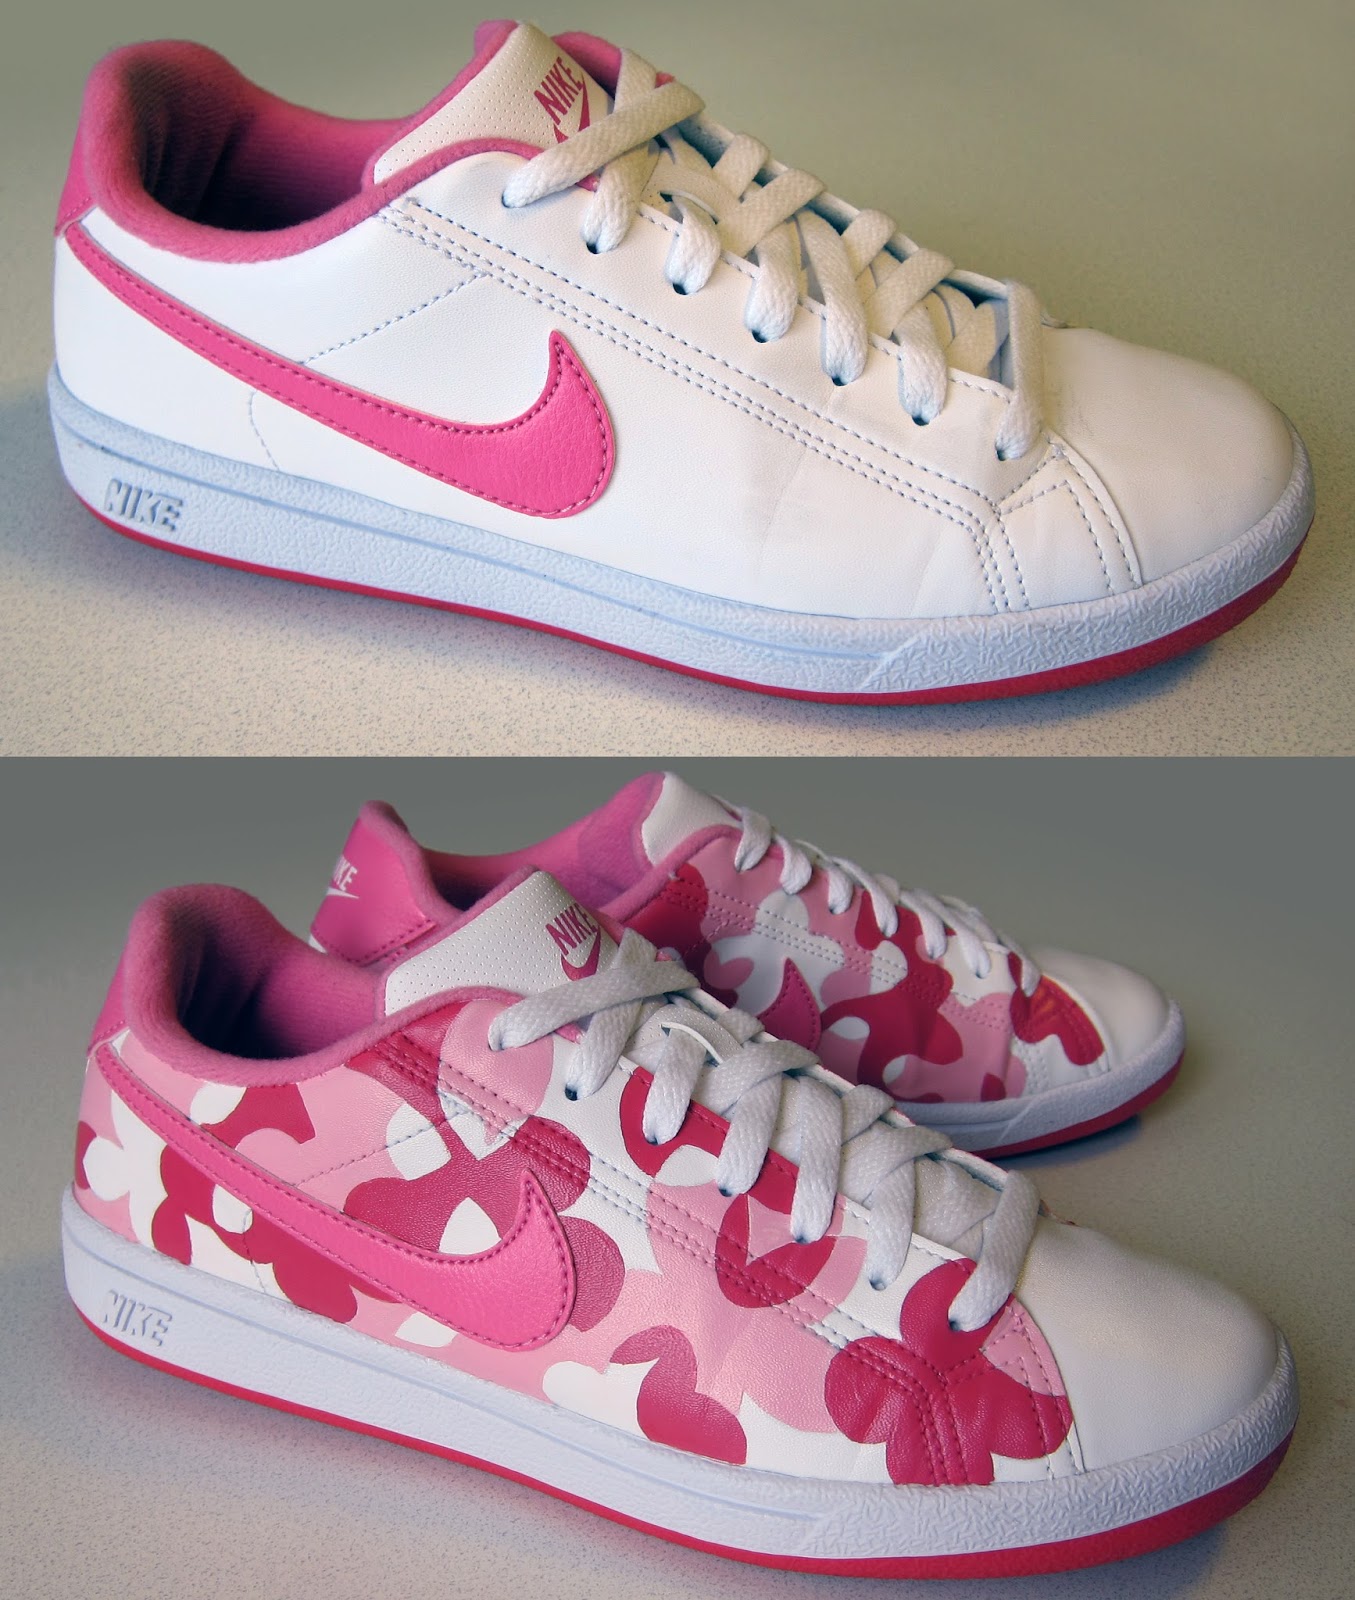
STEP 4: Design your shoe


I like to sketch the design using a pencil as a guide before I paint the shoes.  I don't recommend ink pens or pencils with dark soft leads (6B) as they are tougher to cover up with the paints.

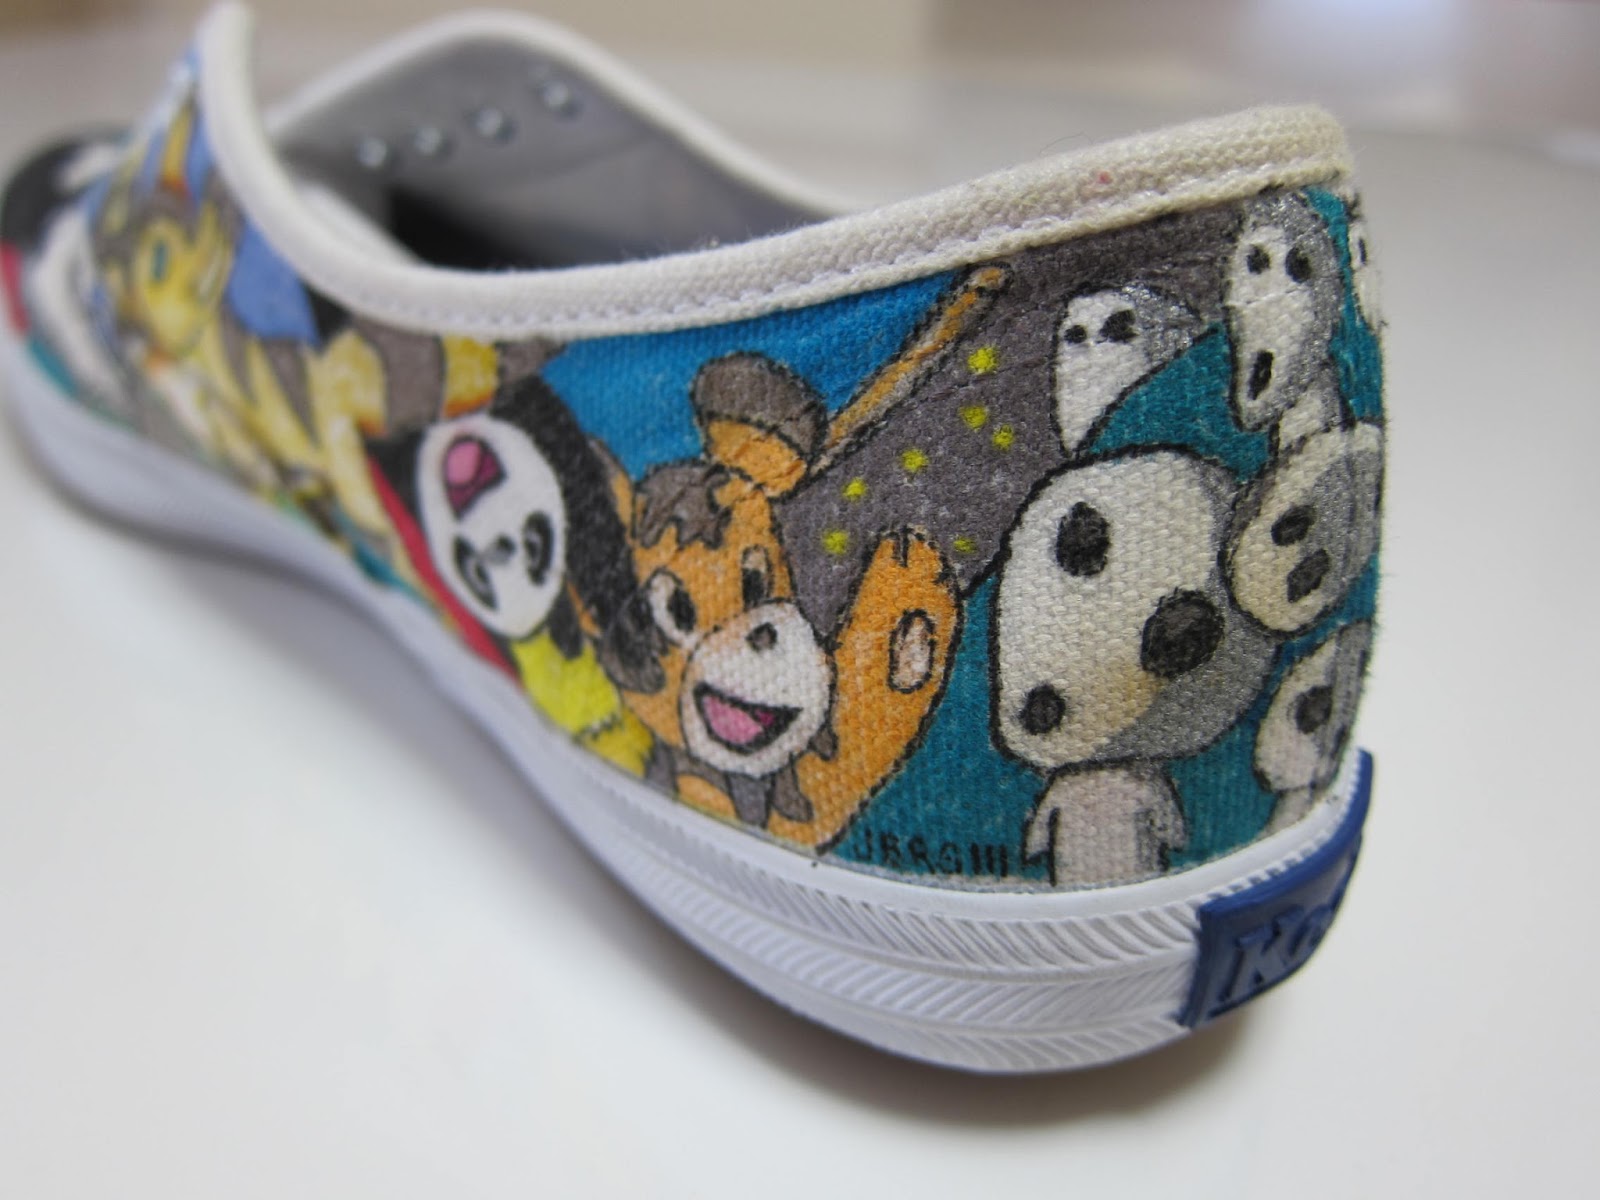
STEP 5: Start painting


Like art, there is no universal standard on how to paint but as a rule of thumb I paint the lighter colors on first.  It's much easier to cover mistakes made with lighter shades of paint with a darker shade than vice versa.

It will take 4-5 coats to get the desired consistency.  Be patient and let each coat dry thoroughly before adding the next coat.  You can save lots of time by using a heat gun like the one below which may be an added expense but a very good investment in my opinion.

Use the low heat setting when drying your paints.  It is sufficient and easier to control.

STEP 6: Apply a finisher

This is the last step and one of the most critical.  Finishers not only give the shoe a nice professional look but it protects the paint from scuffs and scratches.  It's basically the same clear coat we initially removed so the paint can properly adhere to the leather.

I use a matte finish with an added dulling agent (also sold through Angelus Direct) to remove excess shine from the paint.  I like to put two coats just to make sure the entire surface I painted on is protected. This can be applied with a brush or sprayed on using an airbrush with no added diluting agents.


Congratulations, you just customized your very first sneaker.  Any questions?


Till my next post.  Thanks, everyone!
      

Wednesday, May 10, 2017

Harry Potter and the Bespoke Trainers


My eldest daughter loves Harry Potter so it made perfect sense that one of my custom sneaker projects would be based on this popular franchise.  You might also be wondering, "what's up with the title of this post?"  Let me quickly explain.

Bespoke is an adjective for anything commissioned to a particular specification. It may be altered or tailored to the customs, tastes, or usage of an individual purchaser.

Trainer is a term for shoes or sneakers commonly used in the UK.

Now previous to this project, I had never worked with acrylic paints on shoes.  My Ghibli and Star Wars projects used Sharpie markers and Fabricolor pens respectively but I wanted to see how well acrylic paints were for customizing shoes, ehem, I mean trainers.

I was planning on just using a cheap set of paints but my wife convinced me to try a better brand of paints which led me to trying and loving Liquitex acrylic paints.  The paints are easy to mix and they adhere to the canvas material of shoes really well.


Since I had nice paints, it was only logical to invest in a good set of brushes.  After maybe an hour at one of the coolest art supplies stores in all of Japan (Central), I settled on a brand appropriately named Van Gogh.  I got a number of brush tips but my go-to brush is a square 1/8 tip.  I had really good control with this brush which is vital when working with details.


In the end, I consider this project a small success since the paint didn't crack or fade even after a long day of wear by my little lady (and abuse by her younger siblings).  This quickly led to a commission with a similar theme.  You can see pictures of both projects HERE or by checking out my Gallery and selecting Custom Sneakers II.


Till my next post, thanks everyone!

Friday, April 21, 2017

A Happy Little Accident: Studio Ghibli Custom

I'm a big fan of Bob Ross who not only taught us how to paint on his TV show "The Joy of Painting" but he also imparted some great life lessons.  My favorite is when he would say that there are no such things as mistakes, just "happy accidents".  I love that show.  

One day my lovely wife comes home soaking wet after being caught in a rain storm on her way home from work.  She had worn her all white (brand new) Keds that day not knowing that the storm was going to hit that night.  Needless to say, parts of the once pristine white canvas had turned a muddy grayish-brown.  But instead of throwing them into the washing machine to try and restore it back to its original white, we thought it might be a good idea to cover up the stains with artwork.
So what could have been considered a mistake turned out to be a "happy accident" resulting in my very first custom shoe.
I chose Hayao Miyazaki anime films produced by Studio Ghibli as the theme for the custom sneaker project since we had just moved to Japan that year.
Now this project wasn't without its share of challenges.  First, I didn't have the proper materials and had to improvise using colored Sharpie markers and regular artist pens of varying tips to draw the characters on the shoe.  Second, I didn't plan the composition and decided to just "wing it" starting with the Catbus from Tonari No Totoro (My Neighbor Totoro) which can be found on the outer heel of the right shoe.
Despite a lack of planning, I was very pleased with the end result.  But what I didn't know, while spraying water repellant to protect the artwork from smearing, was that Sharpie markers bleed when they get wet.  It's a good medium to make galaxy customs but not ideal if you want sharp lines for definition.  It wasn't a total disaster and fortunately the bleeding ended up looking like nice brush accents.  Another "happy accident".  Check out the rest of the detailed pics below.  Till my next post.  Thanks everyone!


Sunday, March 5, 2017

Satisfying The Passion: Star Wars Custom Sneakers


Let's get one thing straight, I'm a huge Star Wars fan.  In fact, I am passionate about anything sci-fi and comic book related.  I'm a geek at heart and darn proud of it.

I also have a passion for sneakers and have been labeled an OG sneakerhead in the past.  I don't collect much anymore since the sneaker game has evolved into something my forty something year old self can no longer keep up with.  But that love for sneakers will never die, so I figured a paradigm shift was in order.

And so by combining my passion for art (my first and true passion), sci-fi, comics and sneakers, customizing shoes was born.

I'm not a professional by any stretch of the imagination (though I would still love to be one day) but I do my best to produce works worthy to be seen and worn on people's feet.

This brings me to my Star Wars custom sneaker project.  This was my second project as I had previously produced a Studio Ghibli pair for my wife after her all white Keds got stained during a rain storm last year.  I'll publish a post on those sneakers later.

I was inspired to do this project since the franchise got a huge shot in the arm with the release of "The Force Awakens" last, last winter and with Rogue One about to release in theaters.  I chose some of my favorite characters across the different episodes but obviously left out a few which I just found a bit too difficult to fit into the composition of the shoe...sorry princess.  In the end, I was still very happy with the end result.

For my "canvas", I used a slip on canvas shoe from Uni Qlo which I got on sale.  I had previously used colored Sharpie markers but those bled when it got a little wet so I opted to try fabric pens for this project.  I also used artist pens of varying tips with water based permanent ink to draw the details.  I plan to later go over the shoe with acrylic paint just to fill in the large spaces with deeper black tint and finally protect it with a matte finisher from Angelus.

If you have any questions about this project, feel free to leave a comment below.  This item is currently for sale on eBay.  You may access the link here.

Till my next post.  Thanks, everyone!